How to test for radon in your home: a step-by-step guide
TL;DR: Radon is a radioactive gas that causes about 21,000 lung cancer deaths in the US each year, and the EPA estimates nearly 1 in 15 US homes has elevated radon. The only way to know if radon is in your home is to test for it. To test: choose a test, place it on the lowest lived-in level of your home (ideally in the colder months), leave it undisturbed for the full test period, then compare your result to the EPA Action Level of 4.0 pCi/L.
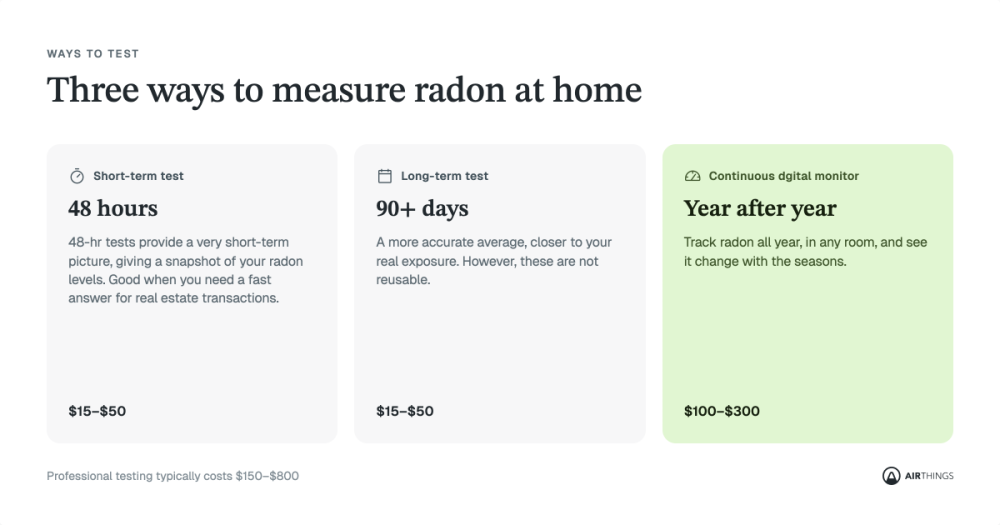
The best way to understand your home’s average radon exposure is a continuous digital radon monitor, which lasts for years, so you can track radon year-round and test different rooms. Other options are short-term tests (2–90 days) for a quick snapshot and long-term tests (90+ days) for a more accurate average. Basic kits start from around $15–$50, digital monitors cost $100–$300, and professional testing costs more.
If your long-term average is at or above 4.0 pCi/L, the EPA recommends fixing your home, preferably with a certified radon mitigation professional. This typically costs $1,200–$2,500 and is a lasting fix. Keep monitoring afterwards to make sure it’s working.
Whether you’re using a DIY radon test kit or a digital radon detector, this guide covers how to test for radon step by step, when to test, which type of test to use, what testing costs, and what your results mean.
How to test for radon in your home: 5 steps
- Choose your test. A continuous digital monitor gives you an ongoing, long-term average and can be reused for years. A short-term kit gives a quick snapshot (useful for a home sale); a long-term kit gives a one-off average after 90+ days. Not sure which to buy? See our guide on how to choose a radon detector.
- Pick the right time. Test during the colder months if you can (late fall to early spring), when homes are sealed up and radon levels typically peak.
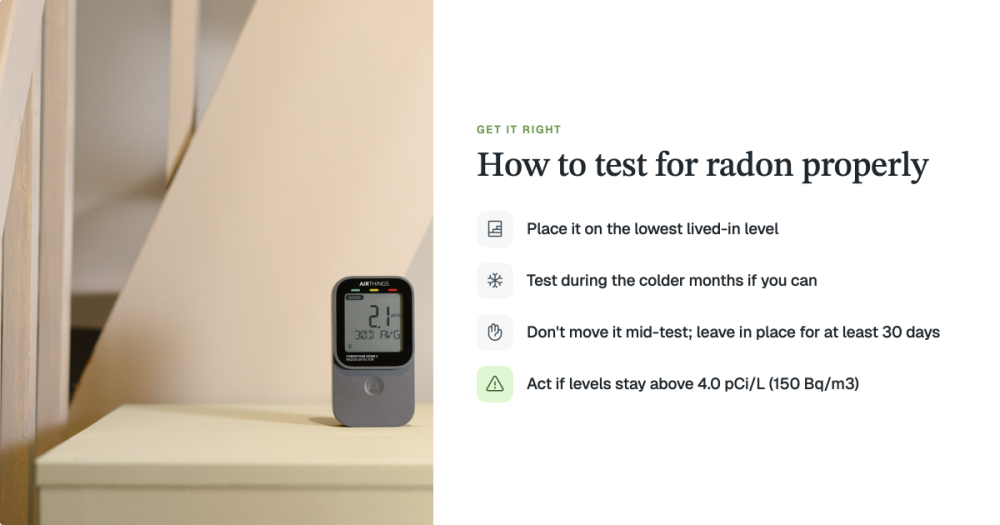
- Place it in the right spot. Use the lowest lived-in level of your home, in a room people use regularly, such as a basement family room, office, or bedroom. Put it on a flat surface such as a desk or shelf, away from windows, doors, air vents, and very damp or dusty areas.
- Leave it undisturbed. Don’t move it during the test. Kits need at least 48 hours (short-term) or 90 days (long-term). With a digital monitor, you’ll see early readings within a day or so, but give it at least a few weeks for a reliable average, and ideally 90 days or more.
- Read your results. Compare your long-term average to the EPA guidelines: at or above 4.0 pCi/L, fix your home; between 2.0 and 4.0 pCi/L, consider fixing it. See the radon levels chart.
Test once, then keep testing
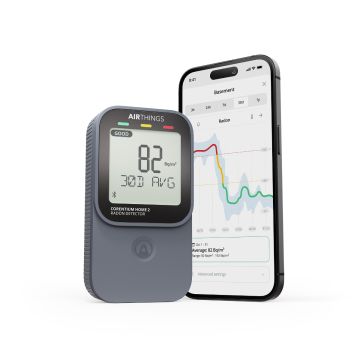
Airthings radon monitors measure continuously and show daily, weekly, and long-term averages in the app. No lab, no waiting, and you can move them room to room for years.
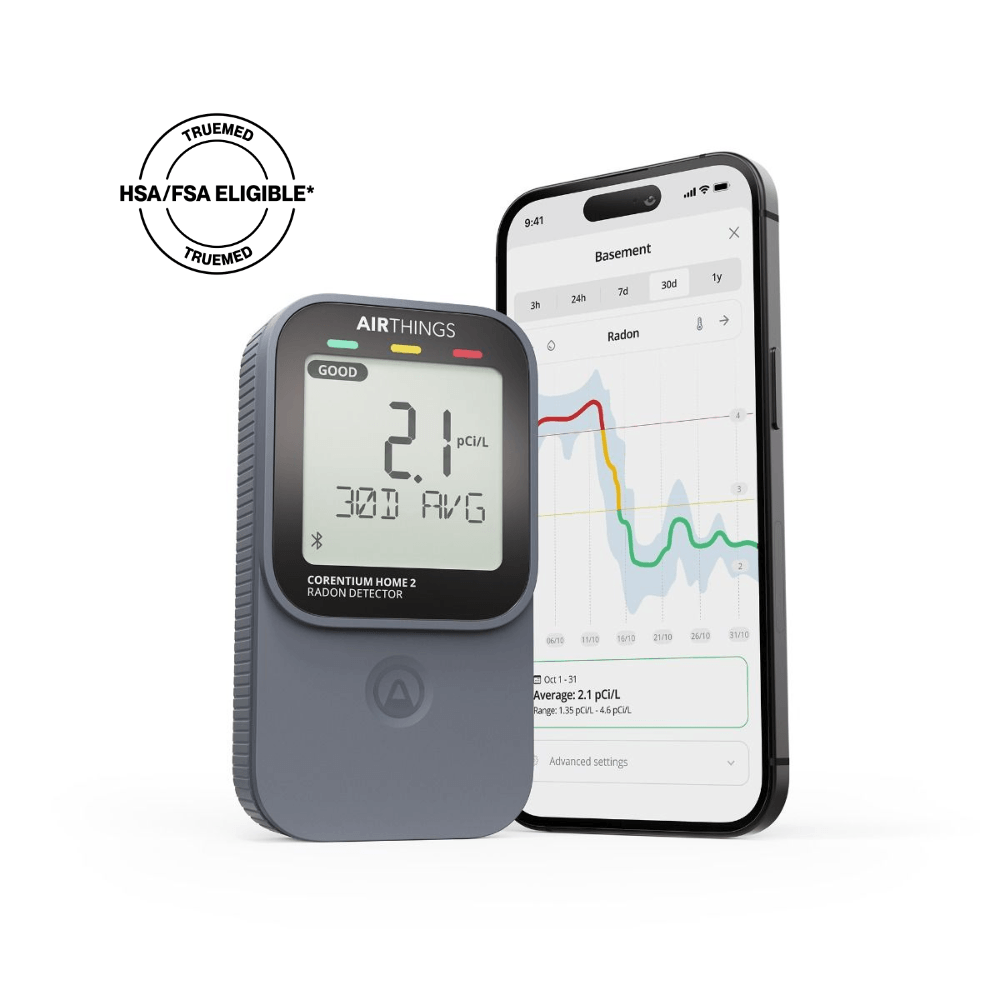
Corentium Home 2
Battery-powered radon monitor with an on-device display and app, plus temperature and humidity. Ideal for basements.
View Radon
Smart radon monitor for the basement or ground floor, with remote access to your readings.
View Plus
Radon plus PM2.5, CO₂, VOCs, humidity, and temperature, for complete air quality in your main living space.
Why radon testing is important
Radon testing is the only way to know if your home has high levels of this radioactive gas. You can’t see, smell, or taste radon, making testing essential for protecting your family’s health.
If you’re new to radon and want to learn more about what it is, where it comes from, and how it impacts us, check out our guide: What is radon?
The stakes are high: According to the US EPA (Environmental Protection Agency), radon is the second leading cause of lung cancer after smoking, causing about 21,000 lung cancer deaths each year.
Radon levels can vary dramatically from one home to the next, even in the same neighborhood. While Airthings’ radon map shows regional radon trends using data from thousands of detectors, the EPA recommends testing every home individually to understand your specific risk. The EPA estimates that nearly 1 in 15 US homes has radon at or above its Action Level.
The good news? Testing is simple and affordable, and if you do find high radon, mitigation is a lasting fix. And if you’ve never tested before, you’re not alone; most homeowners haven’t.
When should you test for radon?
The CDC (Centers for Disease Control and Prevention) recommends testing your home for radon in these situations:
- Your home has never been tested or radon levels are unknown
- You’re preparing to buy or sell a home
- Before and after any renovations, especially foundation or ventilation work
- After installing a radon mitigation system (to verify it’s working)
- Before converting a basement or lower level into living space (bedroom, office, playroom)
What time of year should I test for radon?
It’s best to test your home during the colder months (late fall through to early spring) when homes are sealed tight with windows and doors closed — this is when radon levels typically peak.
For the most accurate picture of your home’s year-round exposure, test during warmer months as well, or use a continuous monitor that covers both.
Which type of radon test is best?
There are several different types of test, including short-term, long-term, and continuous tests. Each type has different advantages and disadvantages, depending on your goal, budget, and timeline. For a side-by-side comparison, see how to choose a radon detector.
The EPA and the CDC both recommend long-term testing for the most reliable results, as radon levels typically peak during winter months when homes are sealed tight against cold weather. A long-term test averages out these fluctuations, and should cover heating and non-heating seasons, to give you a true baseline of your home’s radon level.
What is a continuous digital radon detector?
Continuous digital detectors, or monitors, can be battery-powered or plugged into a mains source. They provide results over time and keep a record of radon levels measured, often with a digital display to see real-time and historical radon readings. Unlike passive charcoal or alpha track detectors, they do not require any analysis by a lab. They can monitor and record radon readings over weeks, months, and even years, providing a great overall picture of your home’s average radon levels. Costs vary between $100–$300.
What are the benefits of digital radon monitors?
- These monitors are portable, so once you are confident with checking the radon levels in a particular room or area of your home, you can move it and begin a new measurement
- Some digital monitors have the added benefit of connecting via Bluetooth or Wi-Fi to an app or dashboard, so that radon data over time can be reviewed more thoroughly
- Digital radon detectors continuously monitor, letting you see how changes in behavior (such as increasing or decreasing ventilation) impact radon levels
- If steps have been taken to mitigate, these monitors provide a simple way to check this is functioning correctly
- Digital monitors can be used for many years, some for 10+ years, making them a very cost-effective way to get peace of mind about radon. For example, a $200 digital monitor that lasts 10 years costs just $20 per year, compared to $25–$50 annually for replacement passive test kits.
Airthings makes digital radon monitors for different needs: Corentium Home and Corentium Home 2 for dedicated radon monitoring (Corentium Home 2 adds temperature and humidity), View Radon for smart radon monitoring, and View Plus and Wave Plus, which combine radon with other air quality measurements. Airthings monitors have featured in several “best radon detector” roundups; for example, Corentium Home was named best radon detector in Bob Vila’s 2025 roundup, After 5 Months of Monitoring, We Found the 6 Best Radon Test Kits, which also included View Plus and Wave Plus.
What are short-term radon tests (2–90 days)?
Short-term radon tests provide a snapshot of your home’s radon levels. These types of test are ideal if you need a fast read-out, for example if you’re buying or selling a home. They are cheap and available at most hardware stores.
Most short-term, DIY “passive” radon tests are charcoal tests: inexpensive and easy to set up. You expose the test to air for a few days, then mail it to a lab where they calculate your results. It’s recommended to choose an EPA-approved test.
Short-term tests like these are affordable and simple to use (typically $15–$50). However, because they are short-term, they likely won’t reflect your home’s year-round radon exposure since levels fluctuate with weather, season, and ventilation patterns. Instead, they offer a snapshot of radon levels at one location.
What are long-term radon tests (90+ days)?
Long-term radon tests, usually alpha track detectors, use a special film that records alpha particles from radon decay and must be sent to a lab for analysis. They run for a minimum of 90 days, with many homeowners testing for a full year to capture seasonal variations. These tests provide a more accurate picture of your home’s average radon exposure, which is crucial when deciding whether you need to mitigate. They cost between $25–$75.
What is professional radon testing?
Professional radon testing services employ certified technicians who use calibrated equipment and follow strict EPA protocols. Professional testing is often required for real estate transactions and provides legally defensible results.
Professional radon testing typically costs $150–$800 depending on your location and home size. While more expensive than DIY options, professional testing may be necessary when:
- Buying or selling a home
- Workplace or school testing is required
- Post-mitigation verification is needed
- You want certified, legally valid results
Checklist: which radon test type should you choose?
Choose a digital continuous monitor if:
- You want ongoing awareness of radon levels
- You’re tracking the effectiveness of mitigation systems
- You value the ability to test multiple locations over time
- You want to monitor how lifestyle changes affect radon levels
Choose a short-term test if:
- You’re buying or selling a home and need quick results
- You want an initial screening before investing in long-term monitoring
- You’re testing multiple rooms to identify problem areas
Choose a long-term test if:
- You want to understand your home’s year-round average radon level
- You’re deciding whether mitigation is necessary
- You’ve already completed short-term testing and want confirmation
Why is continuous radon monitoring best?
The EPA recommends long-term testing, and a continuous monitor gives you a long-term average that keeps updating. An Airthings monitor samples the air every hour, year-round, and calculates a rolling long-term average that accounts for all of these variables.
The biggest weakness of short-term charcoal tests isn’t cost or convenience, it’s how representative they are. Radon levels fluctuate wildly from day to day, which means a 48-hour snapshot can be misleading.
Your results can be affected by:
- Weather: A heavy rainstorm or drop in barometric pressure pulls more radon from the soil
- Season: Winter heating creates a “stack effect” that acts like a vacuum, drawing higher radon concentrations indoors. Exhaust fans and some HVAC systems can also lower indoor air pressure and pull more radon in
- Daily habits: Simply opening a basement window before a short-term test can temporarily flush radon out, making a home with high radon appear fine
How do I set up my radon monitor?
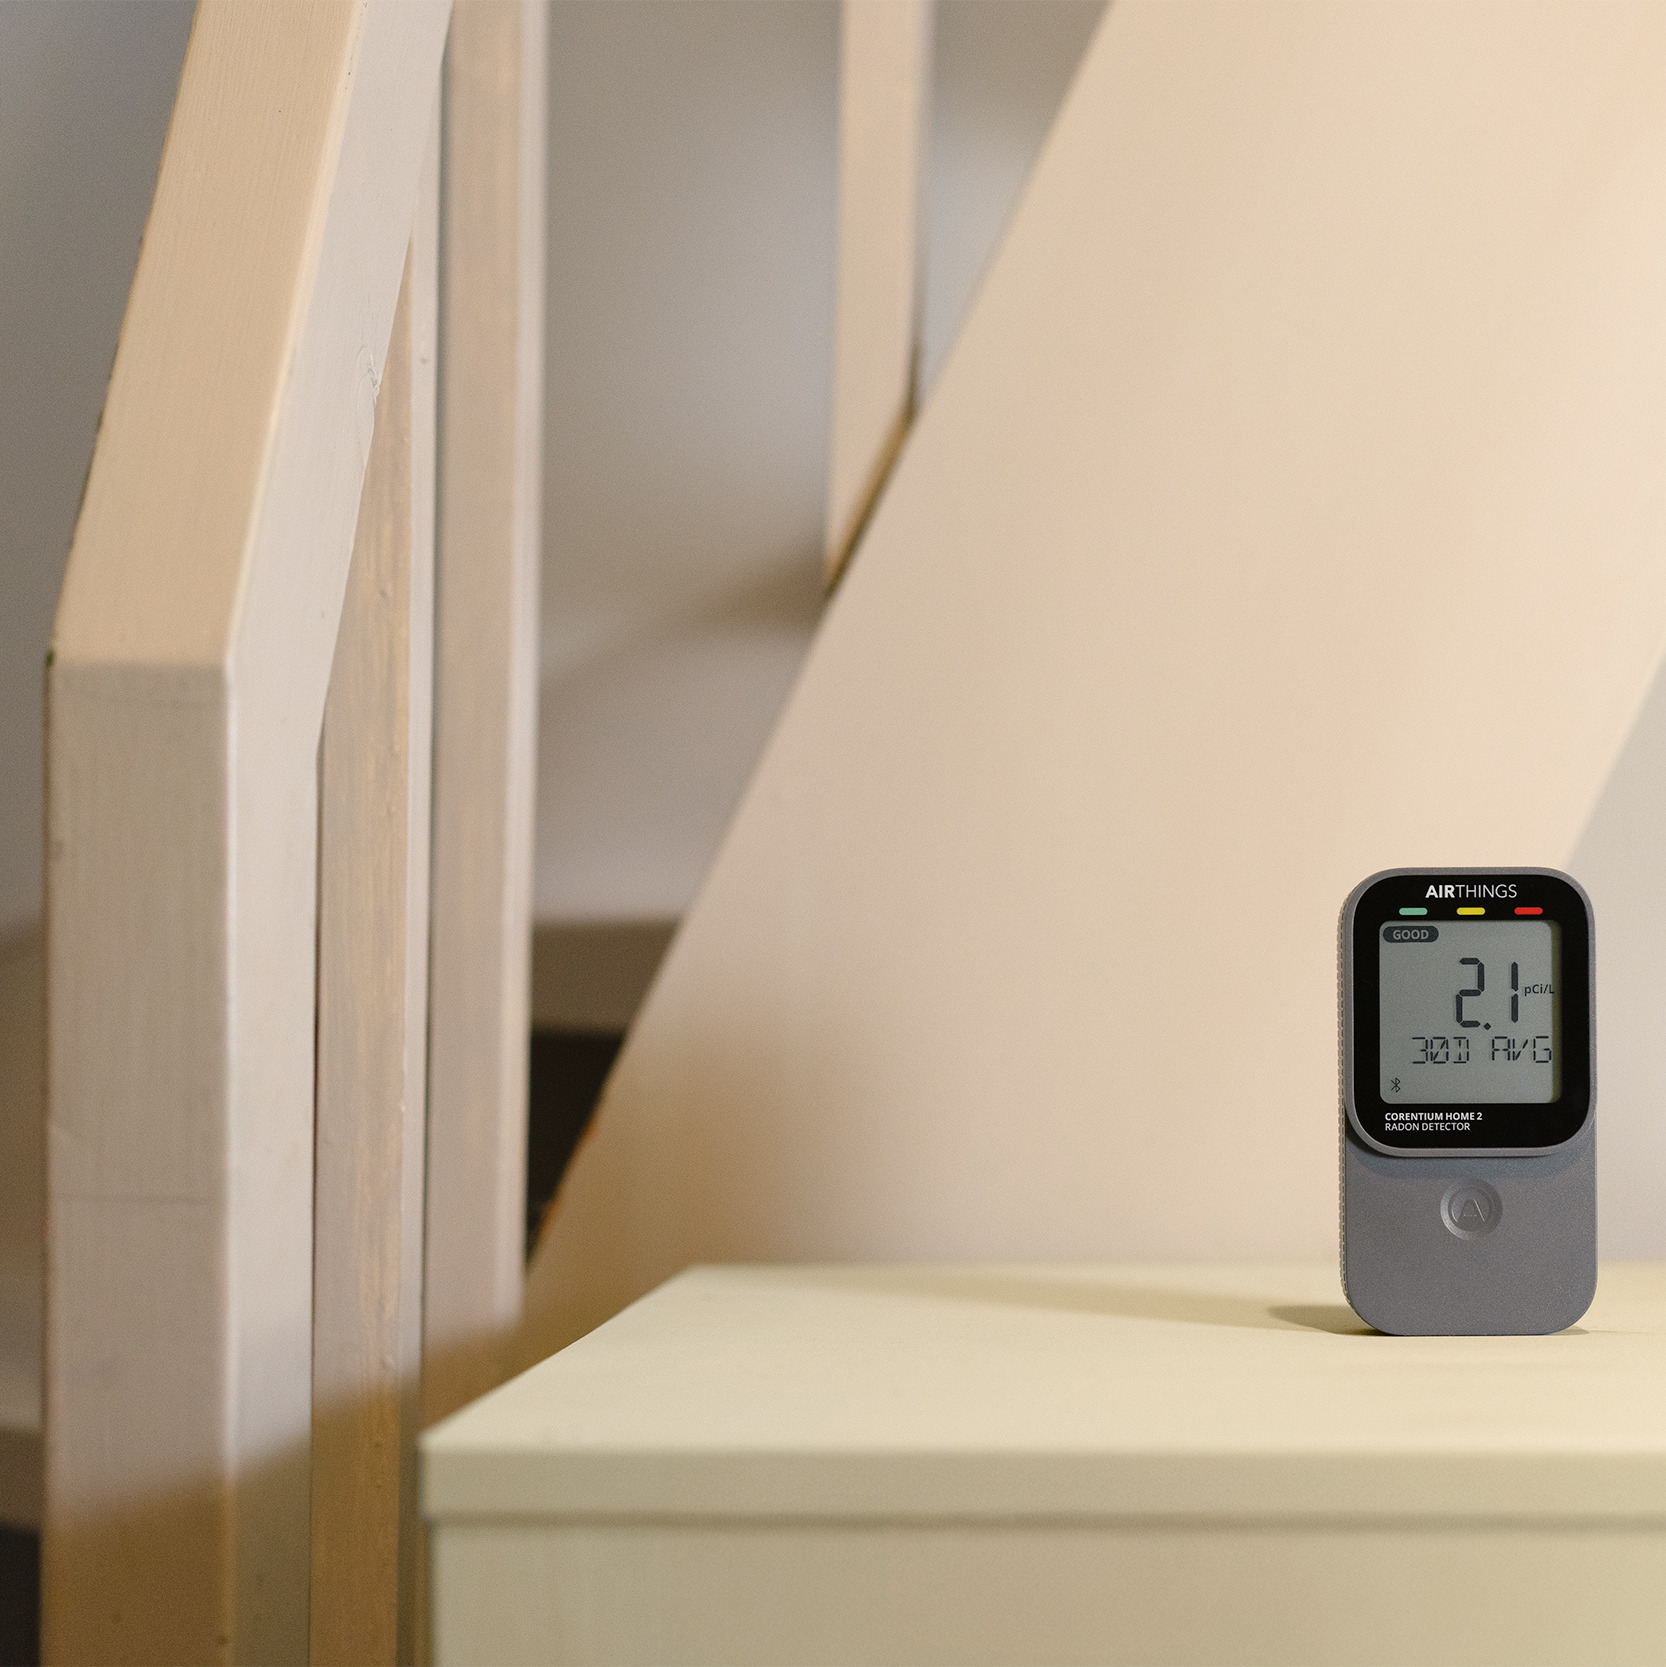
In terms of location, select a room on the lowest lived-in level of your home where people spend time regularly (e.g. family room, office, or bedroom). If you live in an apartment or condo, place the detector in the bedroom.
Place the radon testing device on a flat surface such as a desk, table, bookcase, or shelf. For a continuous digital radon monitor, avoid very damp rooms (humidity over 80%), as this can damage the radon sensor. Do not place near a window or air vent/ventilation system, as this can affect readings.
Then leave it undisturbed during the testing period — do not move it to another location until testing is complete.
What do my radon levels mean?
According to the EPA, there is no safe level of radon exposure, so it recommends that every home be tested for radon. How radon is measured, and the levels at which action is recommended, do vary around the world. See our full radon levels chart.
USA
In the USA, radon is measured in pCi/L, or picocuries per liter.
EPA guidelines for when to mitigate radon:
- Fix your home if your long-term average is at or above 4.0 pCi/L (150 Bq/m³)
- Consider fixing your home if levels are between 2.0 pCi/L and 4.0 pCi/L.
- Because radon is a carcinogen (linked to lung cancer, especially for smokers), lowering levels as far as possible is always beneficial. The average indoor radon level in US homes is about 1.3 pCi/L.
Canada and Europe
In regions that have adopted the metric system, radon is measured in Bq/m³ (becquerels per cubic meter). For reference, 1 pCi/L, or picocurie per liter, is equal to 37 Bq/m³.
The World Health Organization (WHO) recommends that countries set a national annual average residential reference level of 100 Bq/m³. Where that cannot be reached under prevailing country-specific conditions, WHO advises the reference level should not exceed 300 Bq/m³. For a homeowner, that translates roughly to:
- Above 300 Bq/m³: Higher than the maximum reference level WHO considers acceptable anywhere. Mitigation is advised.
- Above 100 Bq/m³: Above WHO’s recommended reference level. Taking steps to reduce your levels is recommended.
- Between 50 and 100 Bq/m³: Below the WHO reference level, but because there is no safe level of radon, it’s worth continuing to monitor.
National guidelines vary. Health Canada recommends taking action when the annual average radon concentration in a normal occupancy area exceeds 200 Bq/m³.
The EPA has compiled a comprehensive guide on how to fix your home: A consumer’s guide to radon reduction: How to fix your home.
What should I do if my radon readings are high?
Don’t panic. The American Lung Association recommends testing at least twice to verify the reading. If it still looks high, there are a number of DIY methods that can help to lower the levels. Read their blog: So your home has high radon levels, now what?
Some steps you can take are to seal cracks in building foundations to help stop radon gas seeping in from the ground. You can also increase ventilation. For more tips on DIY mitigation, you can also read our blog: A practical guide to DIY radon mitigation: What you can (and can’t) do yourself.
However, if the numbers still look high after DIY steps have been taken, then the EPA recommends contacting a qualified radon mitigation professional, as you may need a radon mitigation system to be installed. Most mitigation systems can be installed in a day and bring levels down quickly and lastingly.
What does radon mitigation cost?
For this example, we’ll look at likely mitigation costs in the USA.
If your long-term average is at or above 4.0 pCi/L, you’ll need to factor in mitigation costs, which typically range from $1,200–$2,500 for a professionally installed system. However, catching high radon levels early through testing lets you reduce your lung cancer risk, making any testing investment worthwhile.
The EPA estimates that radon causes about 21,000 lung cancer deaths annually in the United States. With that in mind, spending $100–$300 on reliable radon testing provides invaluable peace of mind and protection for your family’s health.
We dig deeper into mitigation costs in our guide, What does radon mitigation cost? Compare professional and DIY solutions for your home.
How do I find a radon measurement and mitigation service?
If your radon levels are such that mitigation is required, be sure to use an industry-approved professional. Below are some information sources for the USA and Canada.
USA
- The EPA’s guide: Who should I hire to test or fix my home?
- The NRPP (National Radon Proficiency Program) also offers a search function to find NRPP professionals in your area.
- National Radon Safety Board (NRSB): Find a professional
Canada
- CNRPP (Canadian National Radon Proficiency Program): Find a professional
How can I make sure my home is safe from radon?
For most homeowners, a digital radon monitor offers the best value: continuous monitoring at a lower long-term cost than repeatedly purchasing disposable test kits. If you’re simply conducting an initial screening or need results for a real estate transaction, a passive test kit may be sufficient. For certified results required in legal or commercial contexts, professional testing remains the gold standard.
Airthings is a global leader in radon and indoor air quality monitoring, providing reliable, science and research-led technology used in homes, workplaces, and public buildings worldwide. Whatever testing method you choose, consistent measurement and awareness are the keys to long-term peace of mind.
We believe that every home should measure radon.
Frequently Asked Questions (FAQ)
How do I test for radon in my home?
Choose a test (a short-term kit, a long-term kit, or a continuous digital monitor), place it on the lowest lived-in level of your home away from windows, doors, and vents, and leave it undisturbed for the full test period. Kits are then mailed to a lab; digital monitors show results on the device or in an app. Compare your long-term average to the EPA Action Level of 4.0 pCi/L.
What is the best radon test for a home?
For most homes, a continuous digital radon monitor, because it gives you a long-term average, can be reused in different rooms, and shows whether any fix keeps working. A short-term kit is fine for a quick, one-off check, such as a home sale. See our guide on how to choose a radon detector.
How much does radon testing cost?
Short-term test kits typically cost $15–$50 and long-term kits $25–$75, plus a wait for lab results each time. Continuous digital monitors cost $100–$300 as a one-off and can be used for years. Professional testing costs more and varies by location and home size.
Are digital radon detectors as accurate as lab tests?
For understanding your long-term average, a quality digital monitor is often the better choice. A lab-analyzed kit is accurate for the period it measured, but a continuous monitor tracks the air over months and years, so it gives a much more representative picture of your true exposure. Airthings radon monitors use alpha spectrometry and are calibrated before leaving the factory.
Where is the best place to put a radon detector?
Place your radon monitor in the lowest livable level of your home, typically a ground-floor bedroom, basement, or lower-floor living room. Avoid placing it in kitchens, bathrooms, or laundry rooms where humidity and airflow fluctuate heavily, and keep it away from exterior walls, windows, and drafts. The goal is to measure the air your family actually breathes, not a corner of the house that isn’t regularly used.
How long should I test for radon?
The EPA recommends long-term testing of 90 days or more for the most accurate picture of your home’s radon levels. Short-term tests (from 48 hours) can give a useful snapshot, but radon fluctuates significantly with weather, season, and ventilation habits. A single short-term reading can be misleading in either direction, falsely reassuring or unnecessarily alarming. A continuous monitor running year-round gives you the most reliable long-term average.
Do I need to calibrate my Airthings monitor?
No. Airthings monitors are factory-calibrated and designed for the lifetime of the product. They automatically adjust to their environment, meaning you never need to send them away for recalibration or pay annual maintenance fees.
Can I move my radon monitor from room to room?
Yes! Because you own the device, you can test every room in your house. However, leave the monitor in a single room for at least 30 days to get an actionable average for that specific space before resetting it and moving it to the next room.
What do my radon results mean?
In the US, the EPA recommends fixing your home if your long-term average is 4.0 pCi/L (150 Bq/m³) or higher, and considering it between 2.0–4.0 pCi/L (75–150 Bq/m³). In Canada, Health Canada recommends action above 200 Bq/m³. There is no completely “safe” level, so lower is always better.
Do radon levels change over time?
Yes, radon levels in the same home can vary depending on the season, outdoor temperature, barometric pressure, ventilation habits, and even whether windows and doors are open or closed. This is precisely why the EPA recommends long-term testing: a single reading captures one moment, not the full picture. A continuous monitor tracks these fluctuations so your long-term average reflects reality.
What is a dangerous level of radon in a home?
The EPA sets its action level at 4.0 pCi/L (picocuries per liter). At or above this level, the EPA recommends taking steps to reduce radon through mitigation. However, the EPA also recommends considering mitigation between 2.0 and 4.0 pCi/L, as there is no completely safe level of radon exposure. For context, the average indoor radon level in US homes is approximately 1.3 pCi/L.
What should I do if my radon levels are high?
If your long-term radon average is at or above 4.0 pCi/L, contact a certified radon mitigation contractor. The most common and effective solution is a sub-slab depressurization system, a pipe and fan installation that draws radon from beneath your home’s foundation and vents it safely outside. The EPA notes that radon reduction systems can reduce radon levels by up to 99%. Mitigation typically costs between $1,200 and $2,500 and is a lasting fix.
Does a new home need to be tested for radon?
Yes. Radon levels have nothing to do with the age or condition of a home — they depend on the geology beneath it and how the home is built. New builds can have just as high radon levels as older homes, and in some cases higher, because modern construction creates a tighter seal that traps radon more effectively. If you are buying a new home, request radon test results from the builder or carry out your own test before moving in.
Sources
- WHO (Radon and health)
- US EPA (Radon health risk)
- US EPA (What is EPA’s action level for radon?)
- US EPA (A consumer’s guide to radon reduction)
- US EPA (How to find a radon professional)
- US CDC (Radon testing)
- Health Canada (Government of Canada radon guideline)
- American Lung Association (So your home has high radon levels, now what?)
- NRPP (National Radon Proficiency Program)
- NRSB (National Radon Safety Board)
- C-NRPP (Canadian National Radon Proficiency Program)