Remote access to your ecosystem
November 15th, 2023
Congratulations on taking this important step toward a healthier building!
The Airthings for Business solution keeps track of your indoor air quality, enabling you to make informed decisions that lead to increased productivity, reduced sick leave and greater energy efficiency.
The Airthings Space Hub provides you 24/7 access to real time sensor data as well as historical sensor data on your Airthings for Business Dashboard.
At Airthings, we deliver indoor air insights so that you can find the ideal balance between building health and energy efficiency.
The Airthings Team
For technical support or if you have any questions or comments that we did not answer here, you can reach us at business-support@airthings.com or through the chat widget on the bottom right when you log into your account at dashboard.airthings.com.
The Airthings Space Hub only works with Airthings for Business devices. Connection to consumer Airthings devices could upset your subscription and cause additional charges.
Please do NOT try to connect with any devices other than Airthings for Business devices.
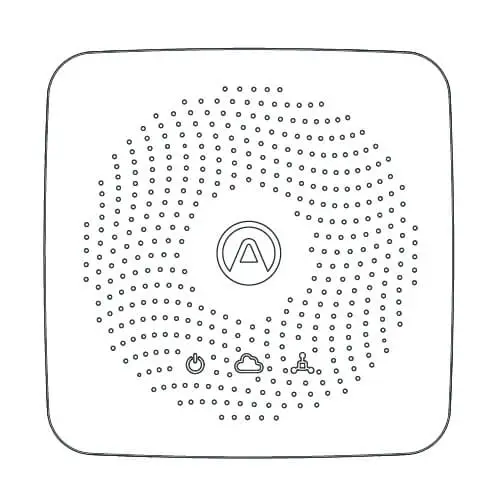
Airthings Space Hub with built-in eSIM
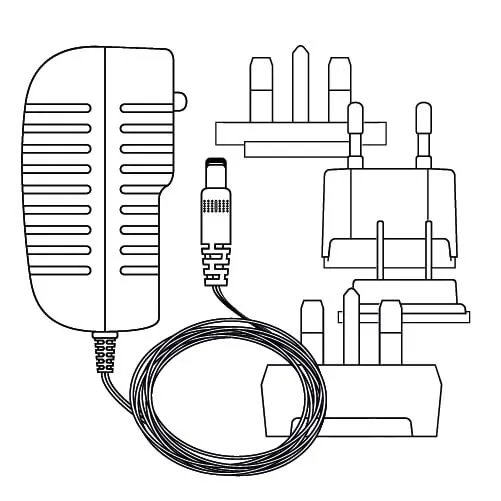
Charger and plug adapters
Rubber bumper pads
.webp)
Double-sided tape
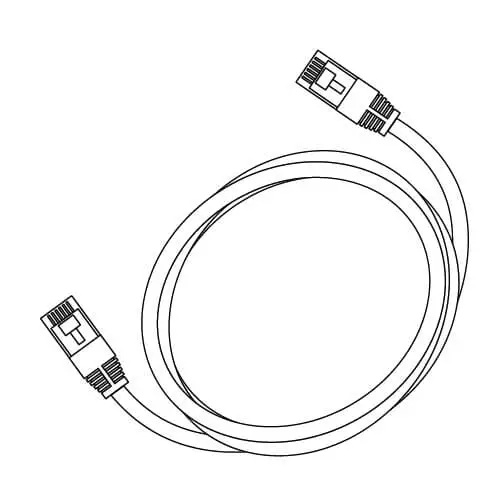
Ethernet cable
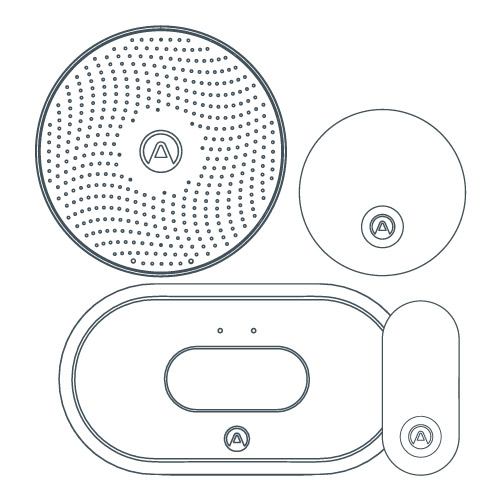
Airthings Space Pro, Space CO2, Space Plus, Space CO2 Mini, Space Nano
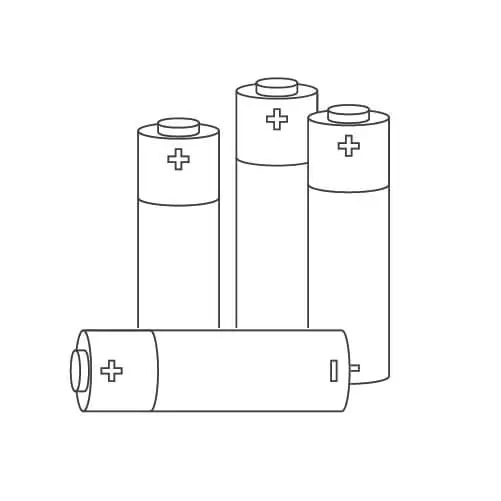
AA lithium batteries (pre-inserted)
Double-sided tape
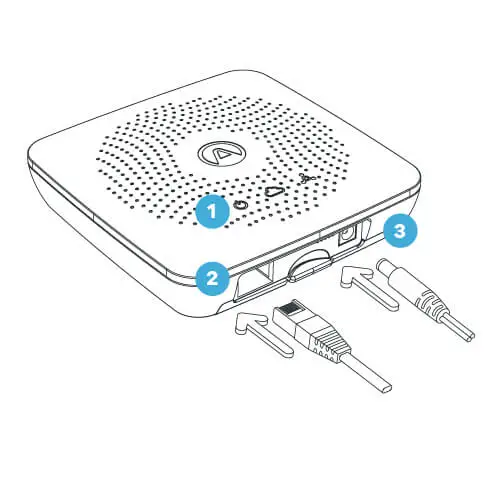
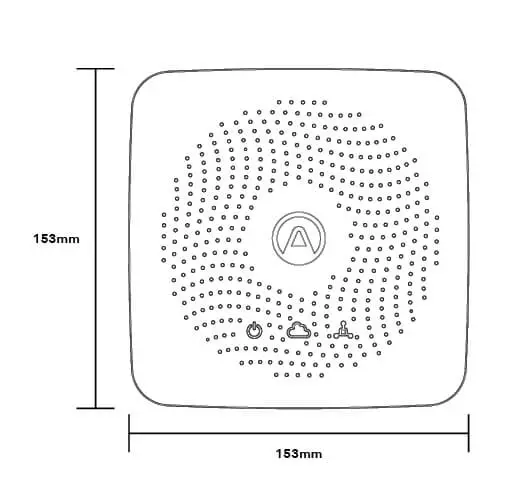
Power Supply: Green when there is power to the Space Hub
Cloud: Green if Hub is connected to cloud. Off no connection OR if no successful transfer to cloud occurred within the last 6 minutes
Airthings SmartLink: Green when sensor data is received within the last 6 minutes
Ethernet
OR
Cellular LTE Cat.M1 & EGPRS(2G)
Manage your account and access your data at dashboard.airthings.com
Airthings SmartLink, 865-870/902-928MHz long-range wireless connection
Live data streaming to the cloud and accessible at dashboard.airthings.com or through Airthings API
100-240V AC / 50-60 Hz
Adapter to 5V DC2A*
*exceptions: India and Japan
To ascertain the regions where the Hub and Sensor devices can operate, please consult the product sheet of the specific device.
During the setup of the Airthings for Business account and when devices are added, the user needs to add an address for each location/building, which will set the correct region for the Hub and devices. Correct information must be set to operate the Hub in compliance with regional radio regulations. The region of the devices will be set by registering the devices in the Airthings for Business app.
Device packages are marked with the region they are supported within. Devices that have a coloured sticker underneath the battery cover have a pre-programmed region. You can change this region by registering the devices using the Airthings business app. The coloured stickers have the following meaning: EU / UK / UAE is blue, US / CA (North America) is red, Singapore, Hong Kong, Macao, Malaysia and Thailand are black, Australia / New Zealand / Japan is yellow, and India is green.
Devices without a couloured sticker come without a preset region and need to be added to your account using the Airthings Business app.
Do NOT connect your consumer Airthings devices to Airthings Space Hub. That will cause additional charges to your Airthings for Business subscription due to the additional consumer devices connected.
Monitor your Airthings for Business devices via the Airthings Dashboard at dashboard.airthings.com or in the Airthings Business app. Do not use the Airthings or Airthings Wave app with the business devices.
The SmartLink radio signal has a typical indoor range of more than 50 meters or 150 feet indoors (Hub to sensor device). The signal can normally penetrate 10 drywalls (non-load bearing walls), or 3 thick walls or floors.
Place the Hub somewhere in the center of the area you want to cover. If the area is too large, or if conditions are not optimal for the SmartLink radio signal, multiple Hubs are required. When multiple Hubs are present, sensor devices will connect to the nearest Hub as long as the Hubs are registered and installed before installing sensor devices.
Avoid placing the devices near large metal objects as they will disrupt the SmartLink radio signal. Moving sensor devices closer to the Hub will usually improve the signal strength, but in some cases, a sensor device might be in a local “radio shadow” where the Hub cannot see the device. Should a device display less radio signal strength than expected, try moving it slightly to see if signal strength improves.
Airthings for Business devices are designed to be used with 1.5V lithium batteries and typically ship with them pre-installed.
Using batteries with a higher voltage can overheat and damage the products which is considered as misuse and will void the warranty.
When the batteries need to be replaced, we recommend using the same 1.5V lithium batteries. The estimated battery life in our product sheets is based on 1.5V lithium batteries. Alkaline batteries will result in a lower battery lifetime.
The Space Pro and Space CO2 can be powered using a 5V USB-C power adapter. Higher voltage adapters can damage the product which is considered as misuse and will void the warranty.
![]() Check Airthings for Business invitation email sent to your email address. Follow the instructions in the email to activate your Airthings for Business account.
Check Airthings for Business invitation email sent to your email address. Follow the instructions in the email to activate your Airthings for Business account.
The Airthings for Business Solution requires an active subscription. You will not be able to continue with the setup without activating your account.
If you do not receive an invitation email, please contact your Airthings Sales Representative.
Alternatively, please contact Airthings Support at business-support@airthings.com.
Download the Airthings for Business app and log in with your credentials.
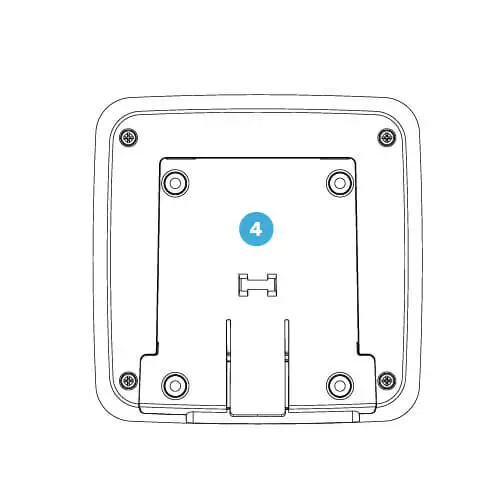
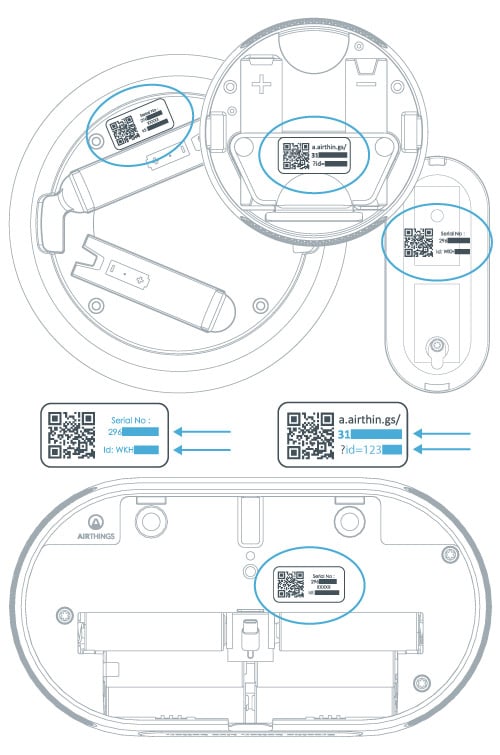
Serial number and Device ID can be found at the back of your device, after removing the mounting bracket
a. Log in to the Airthings Business app with your newly activated account
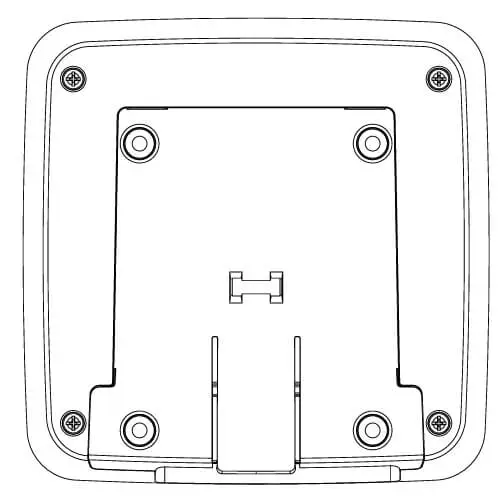
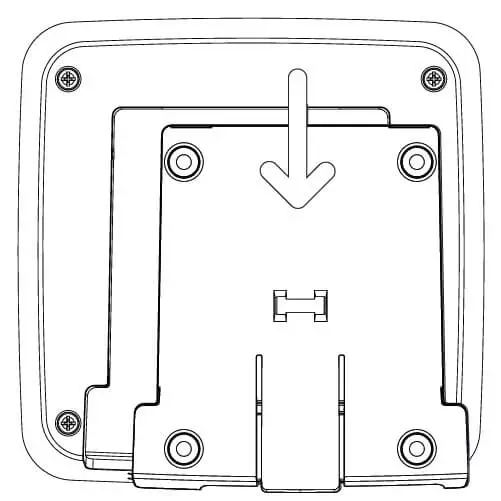
b. Remove the mounting bracket at the back of the Space Hub by slightly lifting it up and pulling it out.
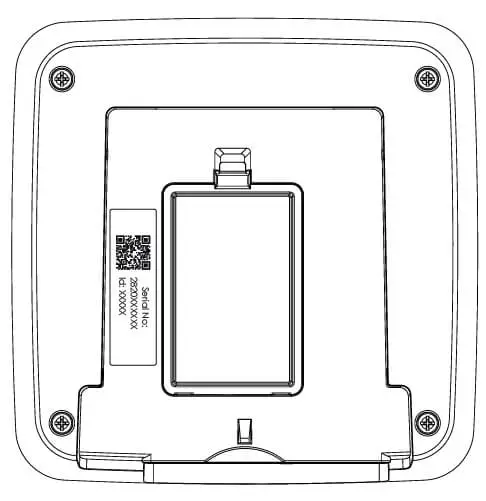
c. Locate the QR code next to Serial Number and at the back of your device
d. Navigate in the app to the building page, click on the + in the top right corner
e. Scan the QR code to register your device
a. Register the Space Hub. The Space Hub has to be registered to an Airthings account before it will connect.
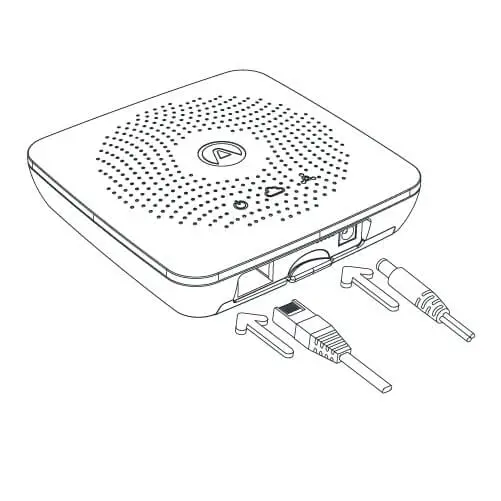
b. Connect Space Hub to your Ethernet cable, one end of the cable to the Space Hub port, the other end to the ethernet outlet
c. Connect Space Hub to power socket
d. Wait for Space Hub firmware upgrade to be completed. This may take 10 to 70 minutes. Registering the Space Hub first (as specified in section 1) can help to reduce waiting time.
Where should I place the Space Hub?
Place the Space Hub somewhere in the center of the area you would like to measure air quality. Place and set up up to 30 Airthings for Business devices clustered around the Space Hub. For each Space Hub, fully complete also setup of the Airthings for Business devices within range, before moving onto next Space Hub.
The Space Hub will not connect to any devices before it has been registered. Make sure you register the Space Hub to your Airthings account at dashboard.airthings.com or in the Airthings Business app. The Space Hub conducts a registration check on start-up, so to avoid issue register the device before powering the Space Hub.
a. Register the Space Hub. The Space Hub has to be registered to an Airthings account before it will connect.
b. Connect Space Hub to power socket. An eSIM/SIM card is pre-inserted in the Space Hub and is ready for use.
c. Wait for Space Hub firmware upgrade to be completed. This may take 10 to 70 minutes. Registering the Space Hub first (as specified in section 1) can help to reduce waiting time.
Each Hub is equipped with an integrated eSIM, which remains concealed, even when accessing the Hub's backplate.
Using a regular SIM card in the Hub will not work and will prevent the device from connecting to the cloud. Stick to the built-in eSIM for proper functionality.
Space Hub model name and number can be found at the back of the device after removing the mounting bracket.
a. Bring the device to the room you want to monitor.
b. Pull the battery tab to power the device. If setting up Space Nano, please follow the device's specific product sheet.
c. Log in to the Airthings Business app with your newly activated account.
d. In the app, navigate to the building and click on the + in the top right corner to add a device.
e. Locate the QR code next to the Serial Number and Device ID at the back of your device behind the back plate.
Where should I place the device?
Place the device in the area you would like to measure air quality and within the radio link range of the Space Hub.
See “Optimal radio range” for more information. Do not permanently mount your devices until the device is checked to be in good radio link range.
I cannot see my device on the dashboard/app
Any devices that do not show up at all are most likely completely out of radio range of the Space Hub. Note that one Space Hub can connect to maximum 30 devices. If a Space Hub fills up with more than 30 devices, it can take up to 4 hours for the devices to find and connect to another Hub within radio range.
What do the radio bars mean?
You can check received radio signal strength for each device in the Dashboard or app. With no signal bars, there is need for improvement. With one or two signal bars you might occasionally miss some sensor data samples. If you see missing data and want to improve, move the device closer to the Space Hub or bring in an additional Space Hub.
A SmartLink connection will be established between a powered-up device and a nearby powered-up Space Hub. It can normally take up to 20 minutes to connect a device to a Hub.
It takes an additional 5 to 10 minutes for device sensor data to be made available in the Airthings Dashboard/App.
Devices are upgraded seamlessly in the background and you do not need to take any action in this process.
Allow 7 days after deployment for data calibration of indoor air quality sensors such as Radon, VOC and CO2.
The Space Hub only works with Airthings for Business devices. Connection to consumer Airthings devices could upset your subscription and cause additional charges.
Only use the Airthings Business app. Do not use the Airthings or Airthings Wave app with Business devices. Doing this can make the Business devices unusable.
Please do NOT try to connect with any devices other than Airthings for Business devices.
Once the device is confirmed in good radio range to the Space Hub, you can permanently mount the device. Use the included double-sided tape for temporary installations. For permanent installations it is recommended to use screws for wall-mount. The devices should never be mounted on the ceiling. Ensure that the device cannot fall onto someone or something and cause damage. Products should not be mounted above 2m. Exception is Space CO2 mini, which If absolutely needed, can also be placed > 6 ft (1.8m) above floor, but in this case double sided tape must not be used.
Optimum product placement is breathing height of 3.6 – 5.6 ft (110 – 170 cm) above floor. Mount the device at least 1 m away from exterior walls, doors, air supply/exhausts, mechanical fans, heaters or any other significant source of heat or cold.
Double-sided tape

Screw (not included)


.svg)
.svg)